The biggest pain point when switching IDEs is user habits. By installing a series of plugins and tweaking configurations, you can make Antigravity feel much more like VS Code—preserving familiar workflows while adding Open Agent Manager capabilities.
If you searched for a practical Antigravity VS Code setup, this walkthrough is optimized for that exact use case. The goal is not to replicate VS Code pixel by pixel, but to restore a familiar extension marketplace, keep your daily coding ergonomics, and still use Antigravity’s stronger agent-style execution. I focus on the concrete setup steps that materially change productivity: marketplace migration, AMP and CodeX installation, editor behavior alignment, and the trade-offs versus GitHub Copilot in real daily work.
Continue Reading
- Qoder AI IDE review and hands-on comparison
- Open-source AI Agent and workflow platform comparison
- Free Vibe Coding tools I actually use
- Oh My OpenCode in AI OSS Landscape
Below are the configurations and steps I actually use. Feel free to follow along.
First Impressions of Antigravity
A few subjective observations:
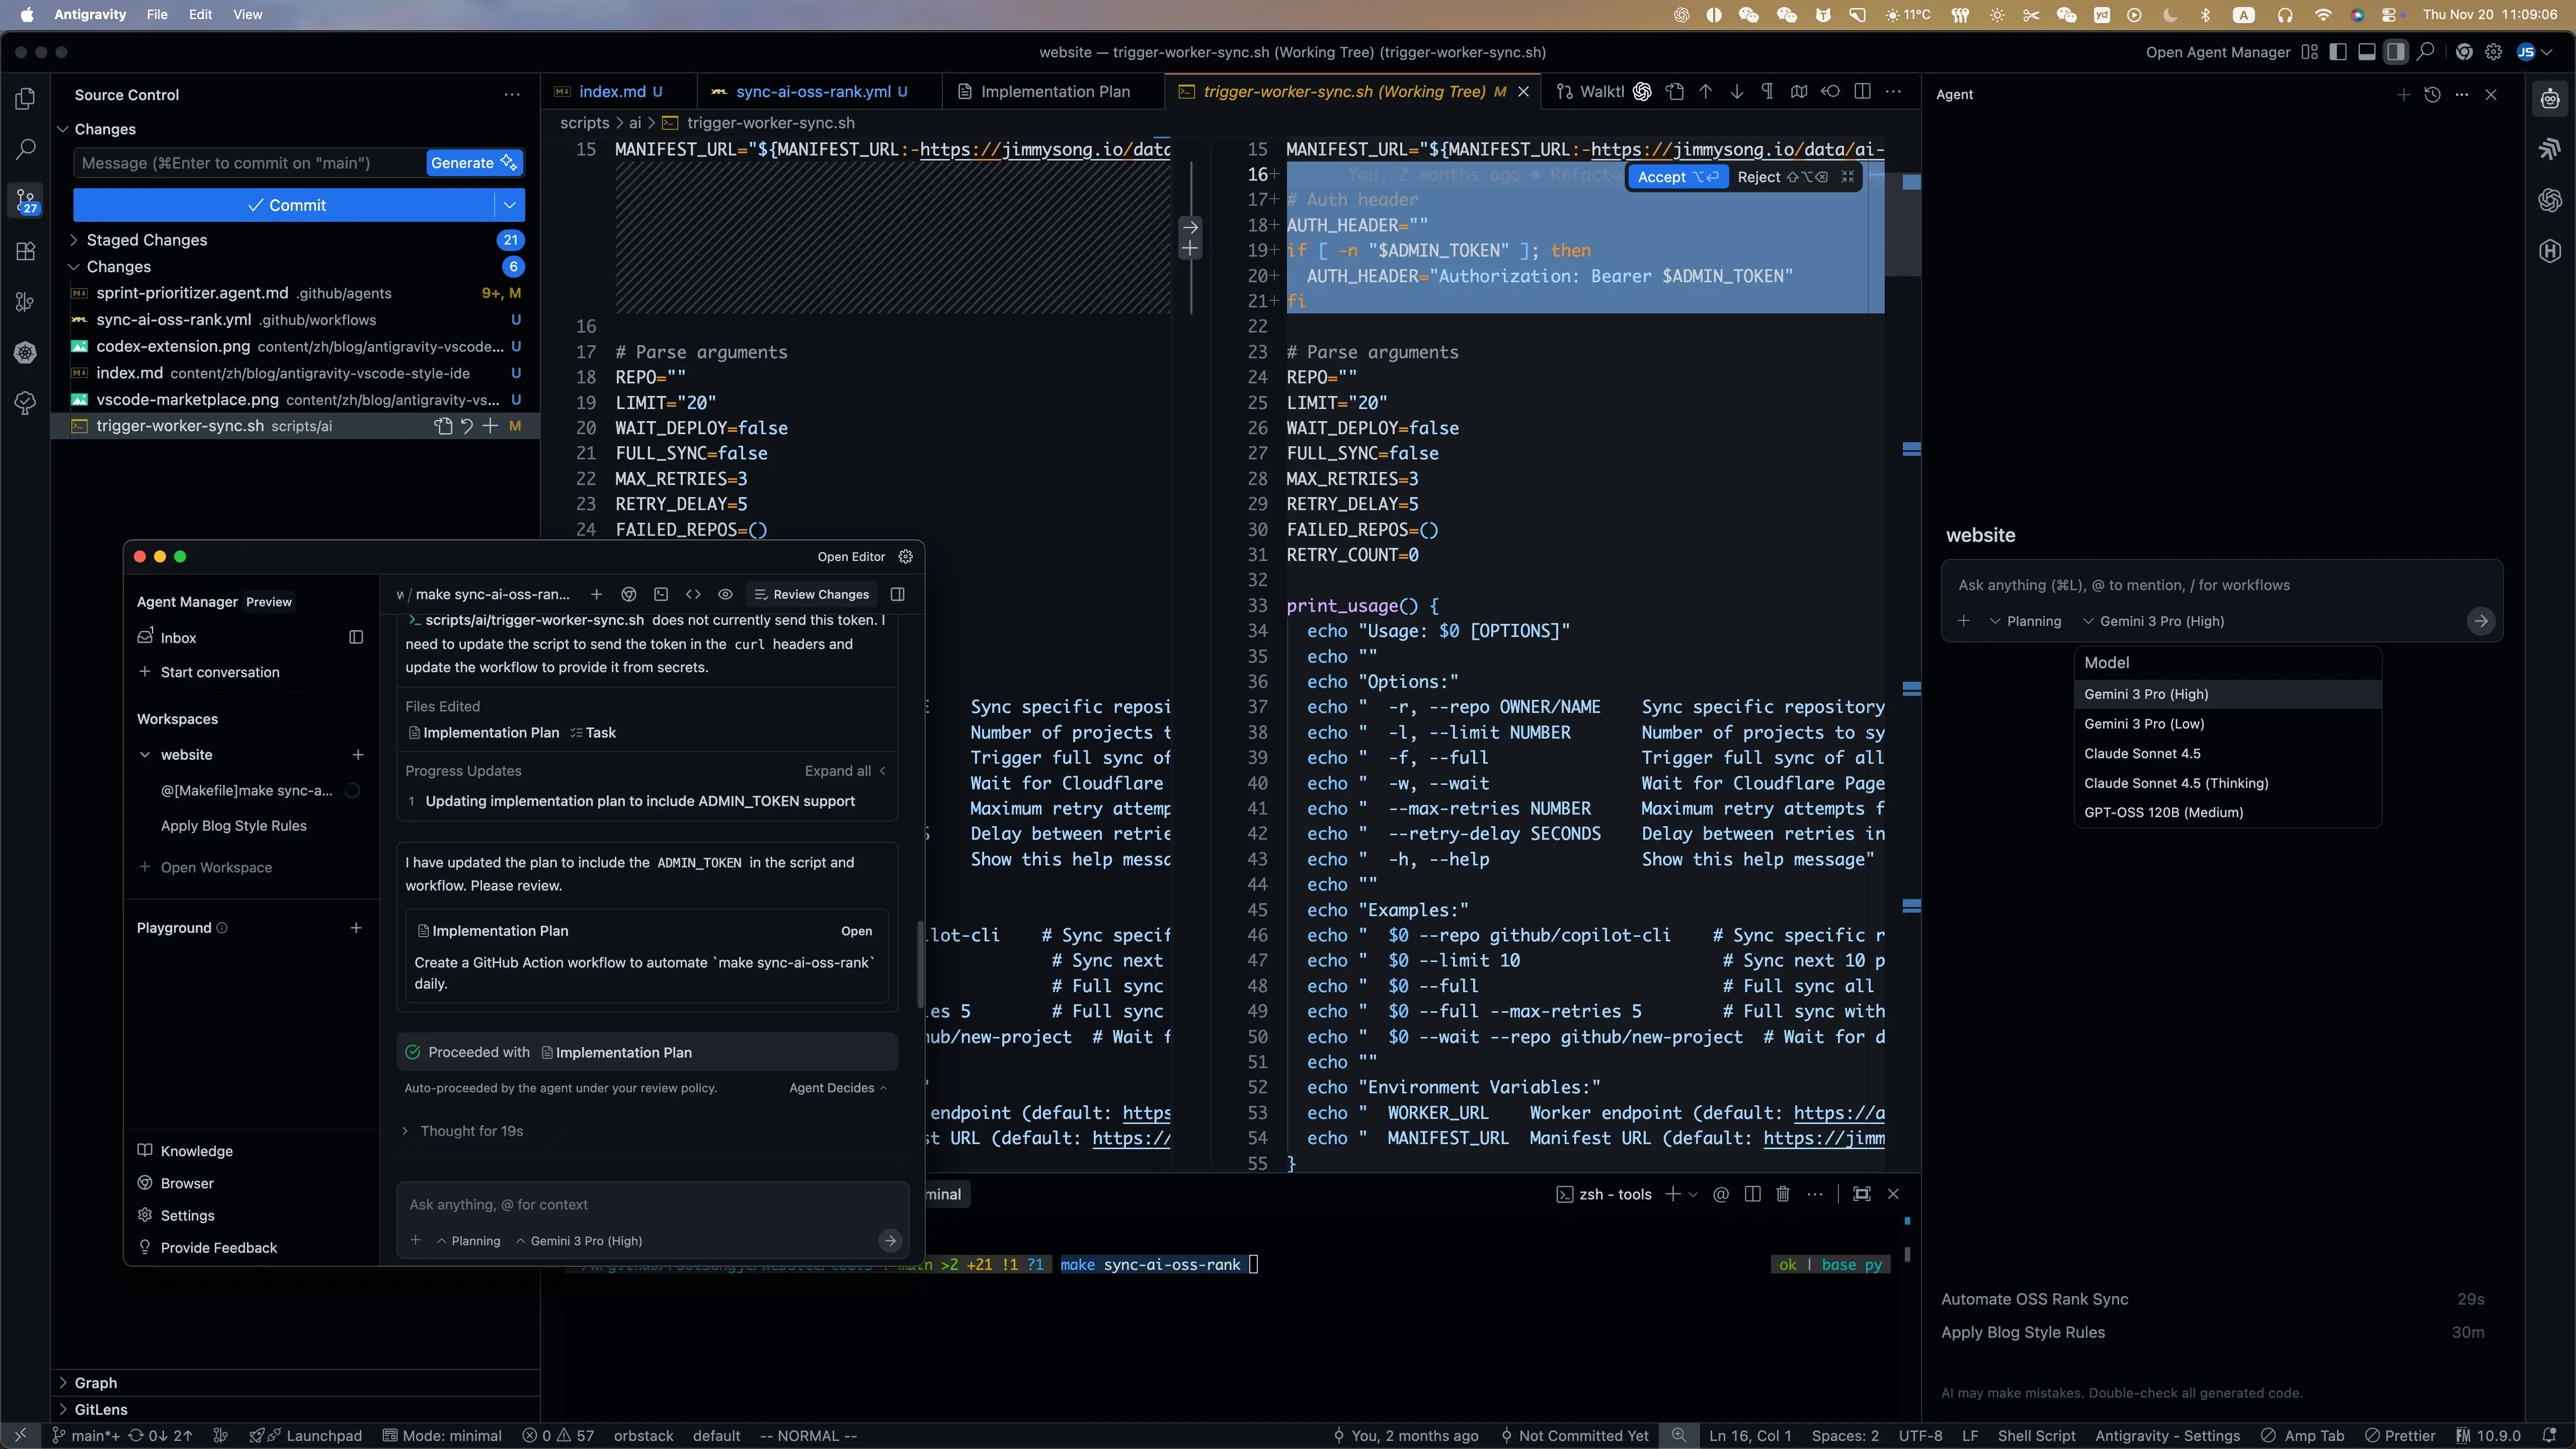
- The interface is split between agent management and editor views, somewhat like AgentHQ + VS Code.
- Agents modify code very quickly, with a much higher completion rate than typical “chat-based” assistants.
- The editor and context windows are large, ideal for long diffs and logs.
- By default, it uses OpenVSX / OpenVSCode Gallery, so the extension ecosystem isn’t identical to my VS Code setup.
All subsequent steps focus on one goal: keep Antigravity’s agent features while maintaining my VS Code workflow.
Switching the Extension Marketplace to VS Code Official
Antigravity is essentially a VS Code fork, so you can directly change the Marketplace configuration.
In Antigravity:
Go to Settings -> Antigravity Settings -> Editor, and update the following URLs to point to VS Code:
Marketplace Item URL:
https://marketplace.visualstudio.com/items
Marketplace Gallery URL:
https://marketplace.visualstudio.com/_apis/public/gallery
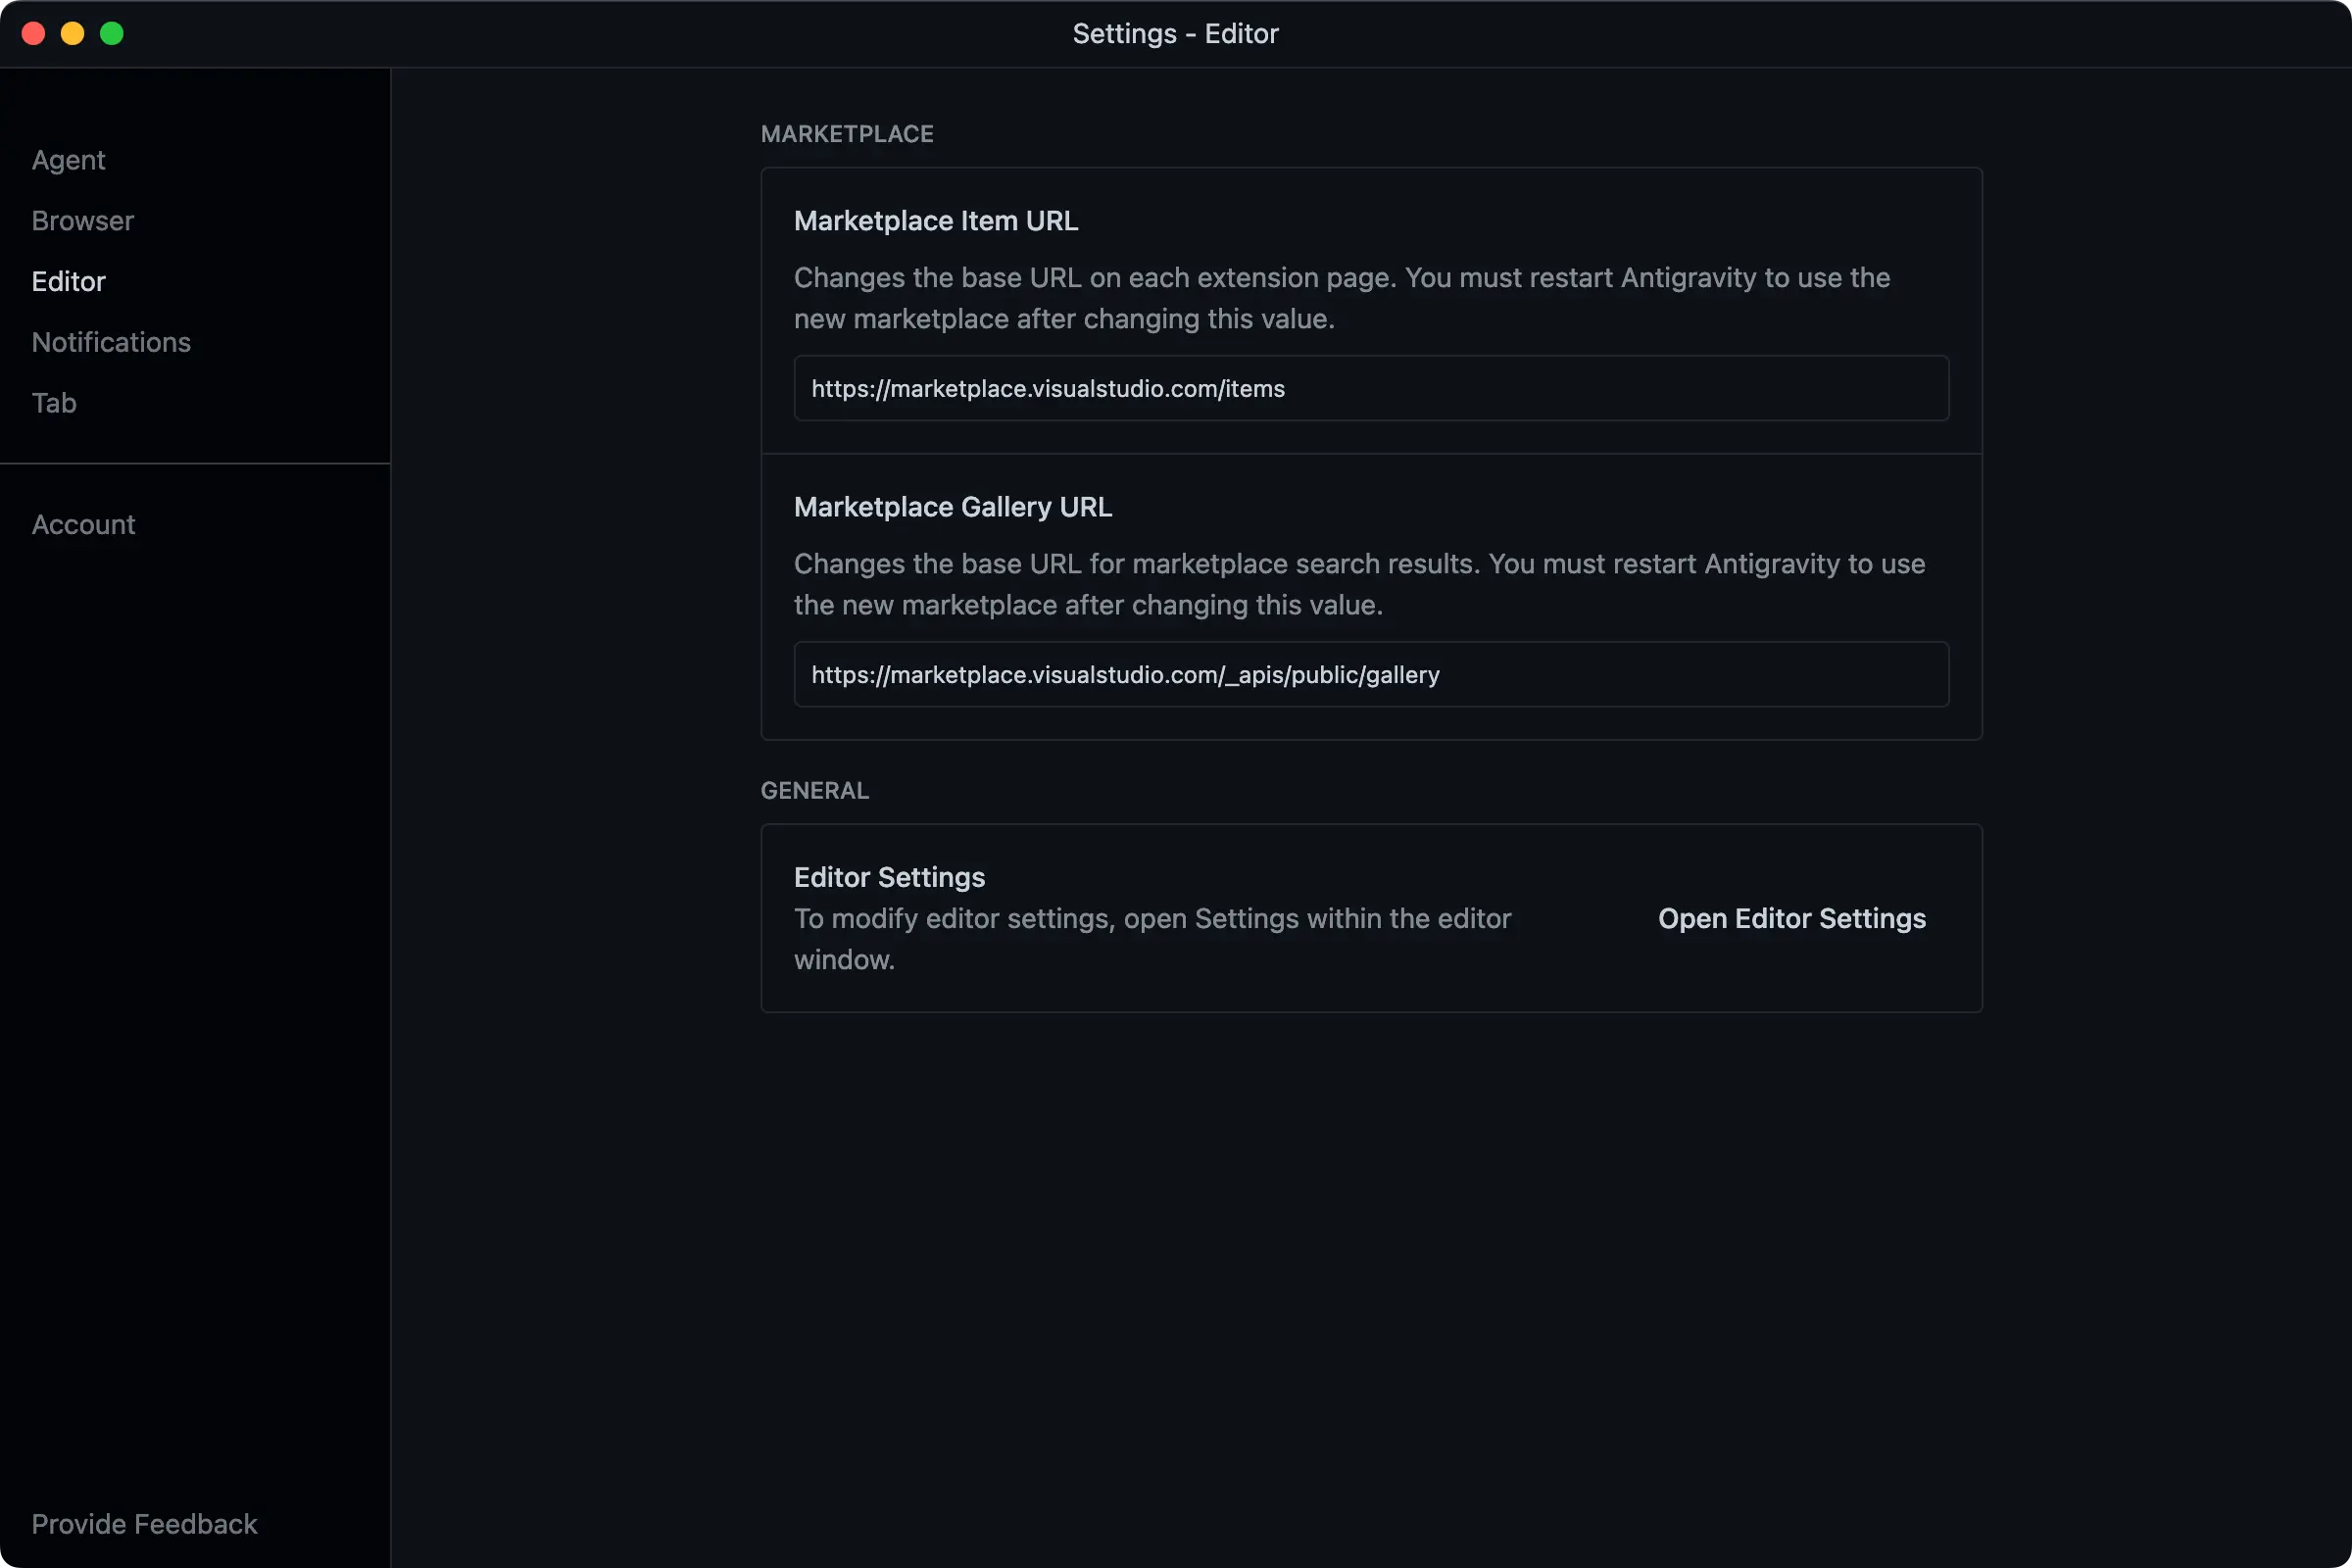
Restart Antigravity.
After this change, searching and installing extensions works just like the official VS Code Marketplace. Installing AMP, GitHub Theme, VS Code Icon, etc., all follow this process.
Installing the AMP Extension
AMP isn’t officially supported on Antigravity yet, but you can install it directly via the VS Code Marketplace.
Steps:
- Open the Extensions panel (the same icon as in VS Code).
- Search for the AMP extension and install it as usual.
- Log in using your AMP API Key.
Currently, Antigravity doesn’t support one-click account login like VS Code; you have to use the API key.
Summary
Once installed, AMP works almost identically in Antigravity as in VS Code—completion and refactoring features are available. The only difference is manual login configuration.
I recommend AMP because it offers a free mode. In my experience, it’s great for writing documentation, running scripts, and as a daily command-line tool. It’s fast, and especially useful for optimizing prompts.
Importing the CodeX Extension
CodeX doesn’t provide a direct VSIX download link on the web. My approach is to export it from VS Code and then import it into Antigravity.
Steps:
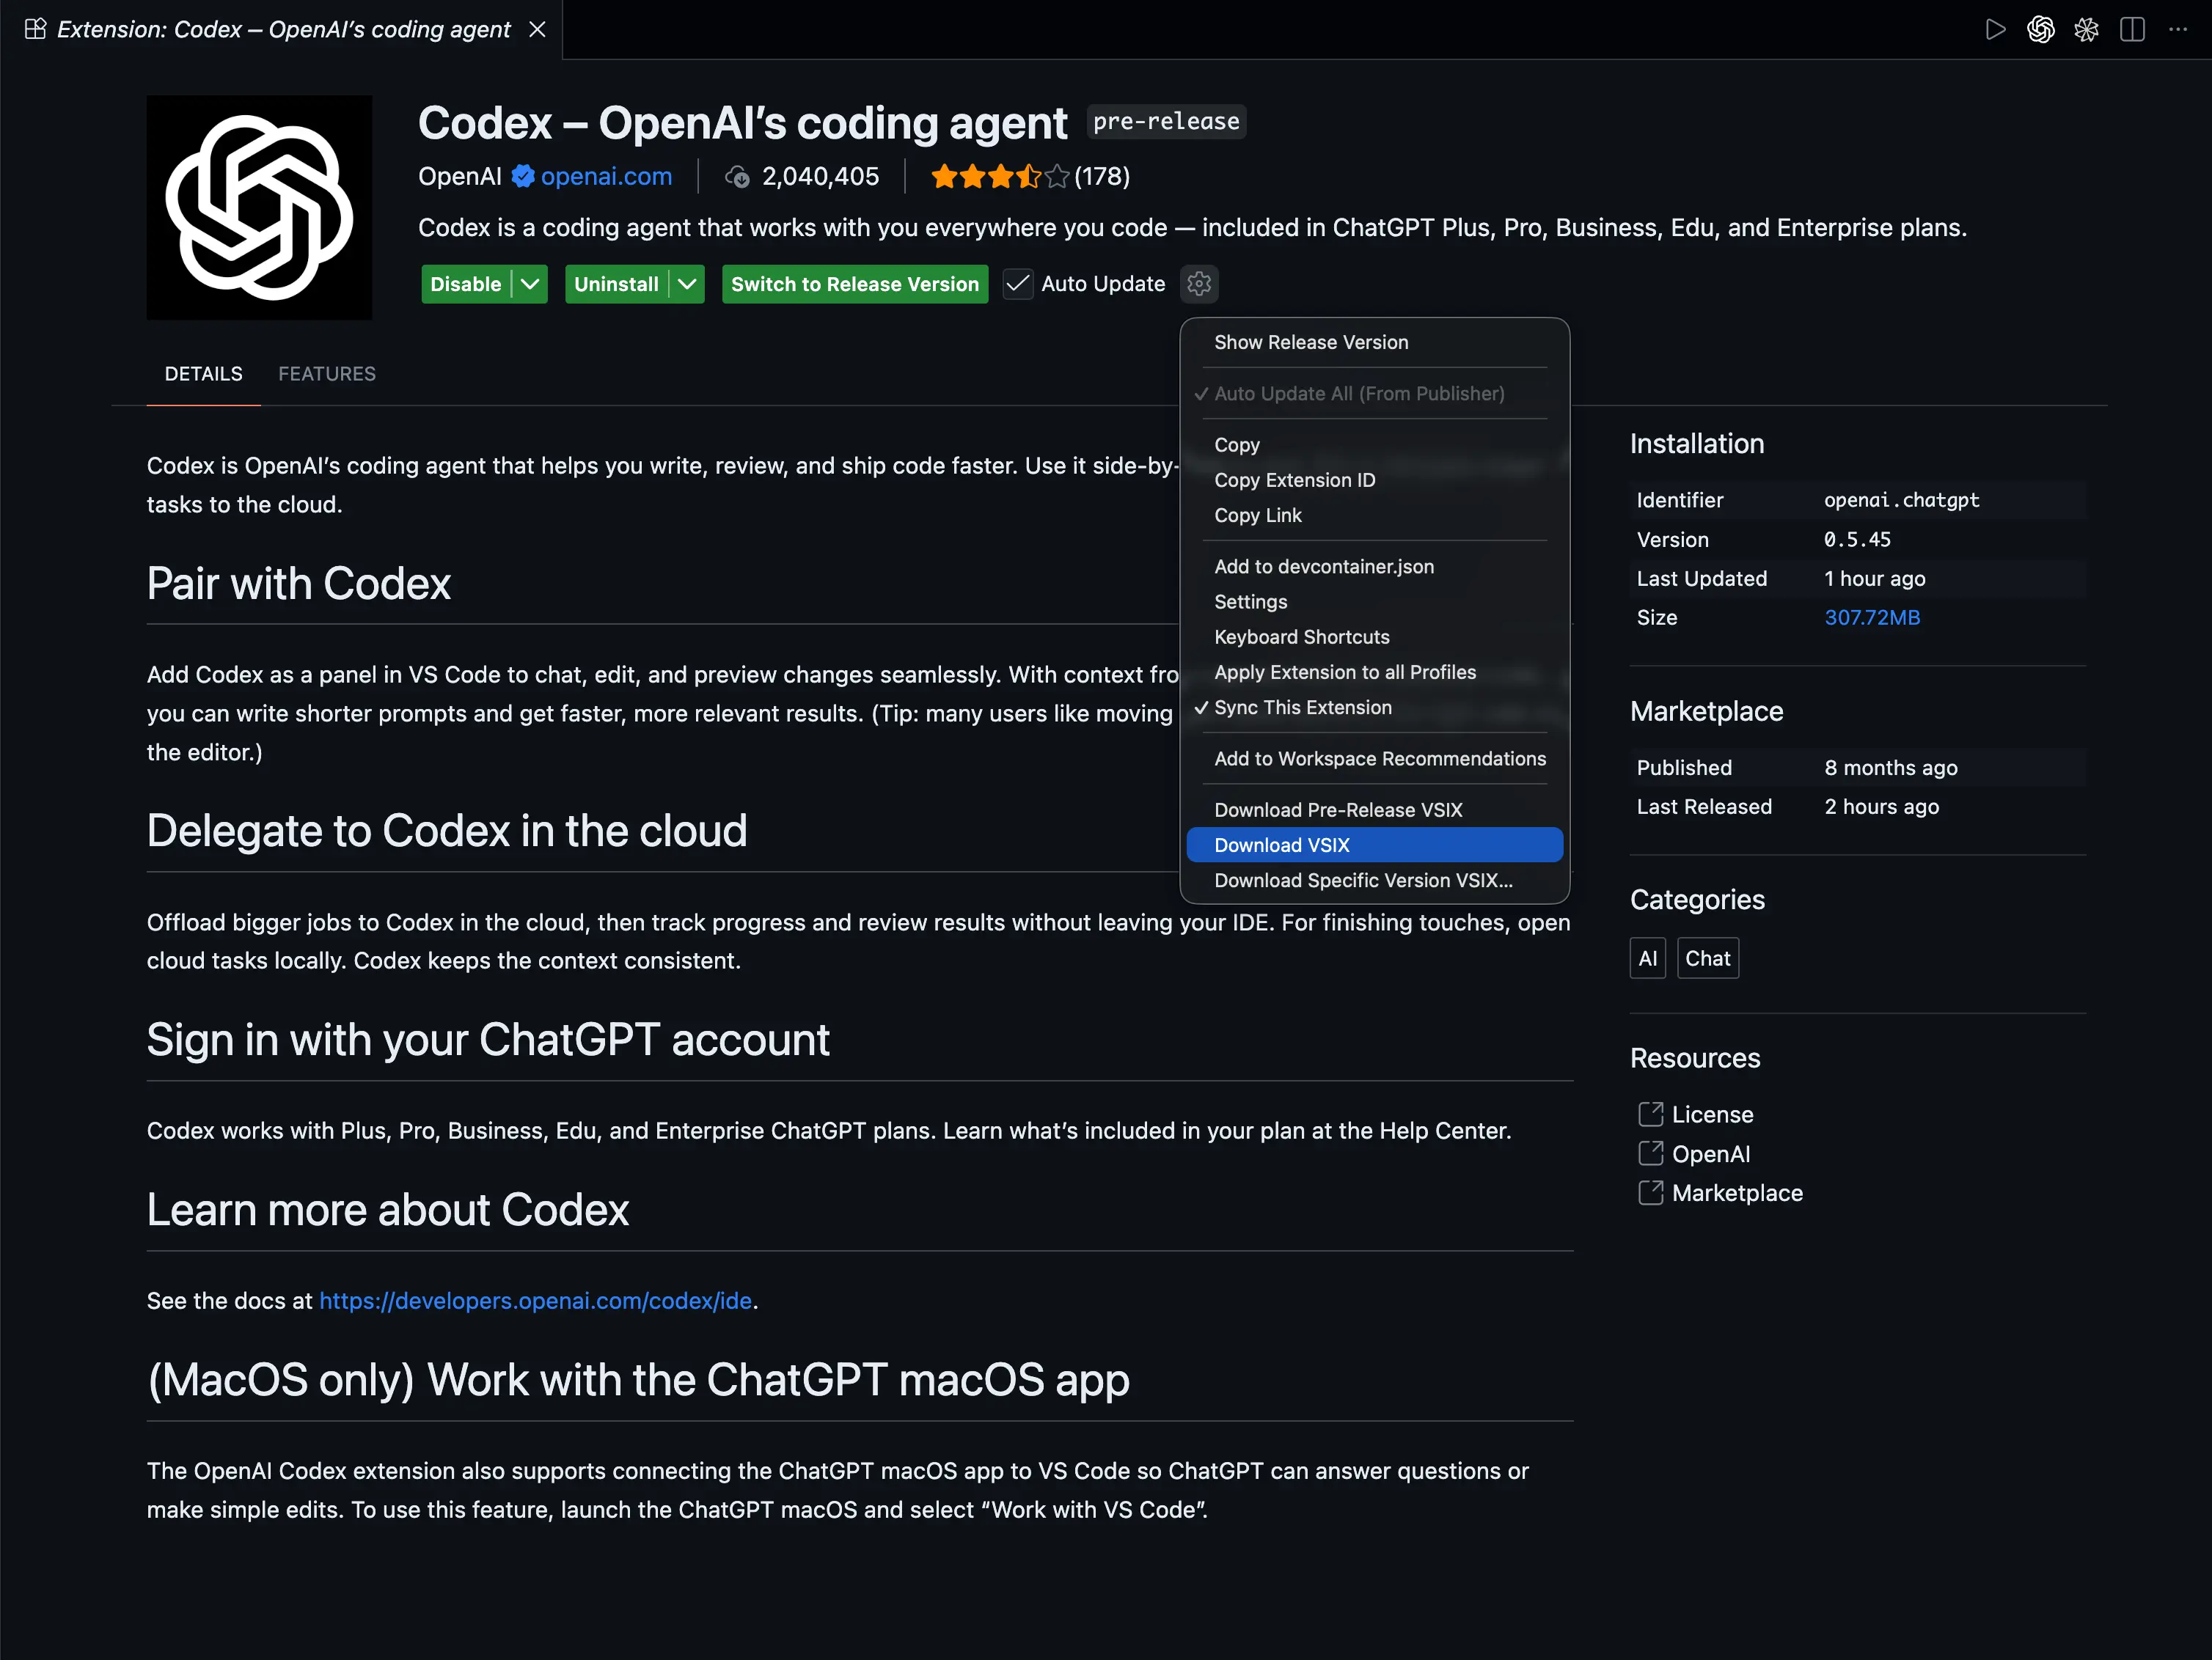
- Install the CodeX extension in VS Code (if you haven’t already).
- In VS Code’s extension manager, find CodeX and export it as a
.vsixfile. - Switch to Antigravity, open the Extensions panel, and select “Install from VSIX”.
- Choose the exported
codex-x.x.x.vsixfile to complete installation.
Tip
Since my local VS Code is already logged into CodeX, importing it into Antigravity automatically reuses the login state—I didn’t need to log in again.
Optimizing Editor Settings
Beyond the marketplace and plugins, a few tweaks make the experience even closer to VS Code:
- Theme: Choose the same color scheme as VS Code to minimize visual switching. I use GitHub Theme and vscode-icons.
- Editor Settings: In “Open Editor Settings”, set indentation, formatting, line width, etc., to match your VS Code preferences. I define these in the workspace’s
settings.json, so no migration is needed.
After these changes, the editing area is essentially “VS Code with an agent console”.
Remaining Issues
To fully migrate from VS Code/GitHub Copilot to Antigravity, I think there are still several key challenges:
- Limited Customization: Antigravity can’t support custom prompts and agents like Copilot Chat. Currently, only “rules” configuration is available, which limits workflow flexibility.
- Model Ecosystem Needs Improvement: Antigravity hasn’t natively integrated the latest models from major vendors (OpenAI, Anthropic, Microsoft, xAI, etc.), whereas GitHub Copilot excels here.
- Cost Considerations:
- Future pricing may start at $20/month.
- No free models are supported, unlike GitHub Copilot (even Copilot Pro users have free model options).
- Stability Issues: Agents often encounter “Agent terminated due to error” during operation, requiring manual retries or new sessions. This affects workflow smoothness, though I expect improvements in the future.
GitHub Copilot VS. Antigravity
Although Antigravity excels in several areas, there is still significant room for improvement compared to the combination of GitHub Copilot and VS Code.
The large language models (LLMs, Large Language Models) I frequently use are all supported in VS Code:

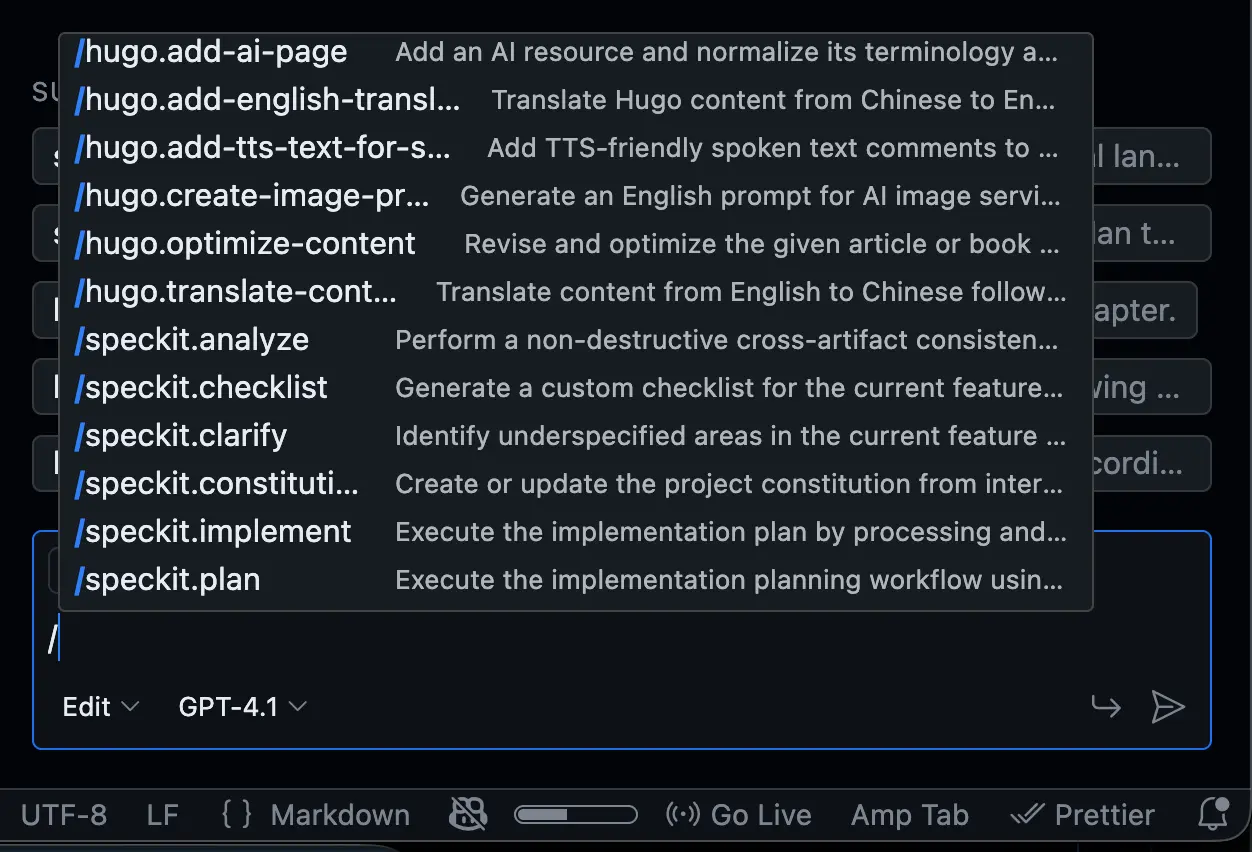
My long-accumulated custom prompts:
My collection of agents:
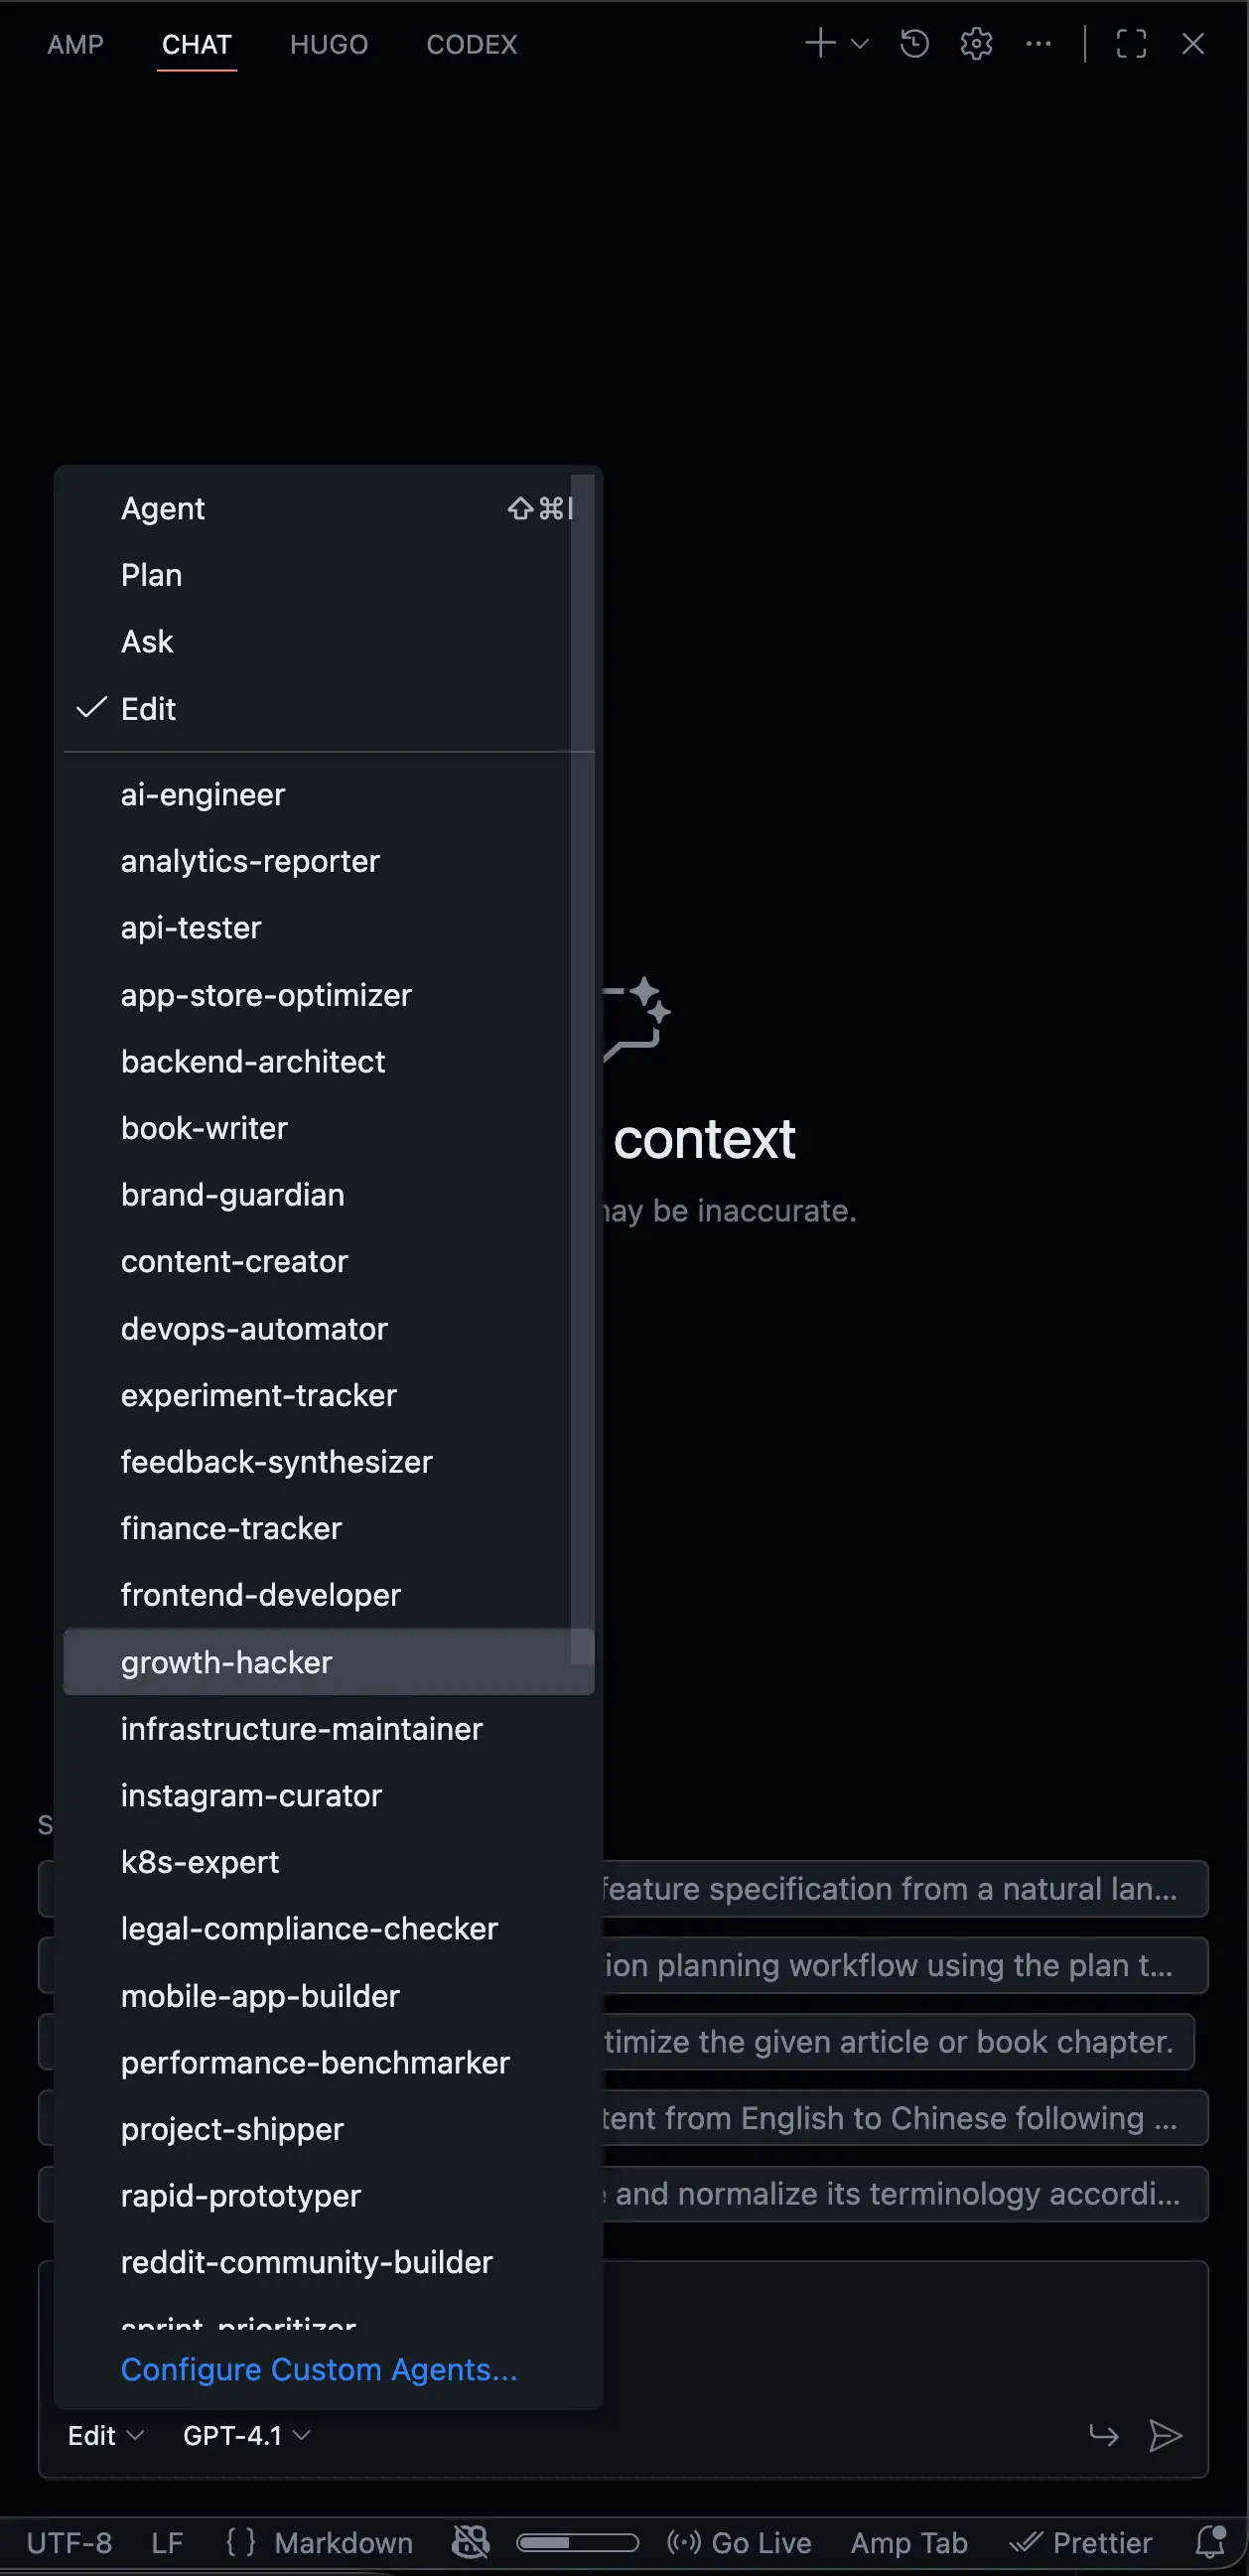
Here are some personal experiences using VS Code and Copilot that, for now, are hard to replace with other IDEs:
- The Ask/Edit/Agent/Plan workflow perfectly fits my working habits.
- Support for custom prompts and agents is essential. Many of my prompts and agents have been refined over time and are deeply integrated into my daily workflow—it’s hard to find alternatives elsewhere.
- New models are integrated at lightning speed. Whenever a new model is released, GitHub Copilot is among the first to support it.
- The integration with VS Code is seamless—no extra configuration required, making it extremely convenient.
- Frequent updates: just a few days ago, a bug I reported to VS Code was fixed the same night.
- Copilot Chat’s keyboard shortcuts make it easy to quickly access various features.
- GitHub has granted me a free Pro account. Although the monthly premium quota is only 300 calls, combining Copilot with other plugins like AMP, Codex, Droid, and Qwen enables a highly efficient workflow. Even if I upgrade to a paid account in the future, the $10/month fee is very cost-effective compared to similar products.
Practical Experience
A few subjective tips from my actual usage—take them as reference:
- Don’t treat Antigravity as “VS Code + chat box”. Use its agent features for complete tasks: let the agent propose a plan, then execute changes.
- For major changes, always create a new Git branch and restrict agent actions to that branch. Handle all diffs via standard Pull Request (PR) workflows.
- Ask agents to produce “artifacts” (plans, proposals, test descriptions), not just final code. This makes it easier to review and track changes.
- Plugins you’re already comfortable with in VS Code (like AMP, CodeX) can be migrated directly, reducing cognitive load and letting you focus on new agent workflows.
Summary
My current experience: Antigravity delivers powerful agent capabilities and multi-view consoles. By following these steps to align the interface and plugin ecosystem with VS Code, you can smoothly transition your daily development workflow.